

Hey everyone, today I would like to share with you my CSS journey at Learn Code Online ineuron.ai BootCamp 2.0 on Full stack JavaScript.
So far I have learned new things as well as understand better things I already know.
TABLE OF CONTENTS
* What is CSS and Why use CSS and its ways?
Inline CSSInternal CSSExternal CSS
* What is a selector?
1. Universal Selector
2. Individual Selector
3. Class and ID Selector
4. AND Selector
5. Combined Selector
7. Inside an Element Selector
8. Direct Child Selector
9. Sibling Selector
10.Pseudo-element Selector
::before
::after
::first-line
::first-letter
::selection
11. Pseudo-class Selector
:link
:visited
:hover
:active
:focus

* What is CSS?
CSS stands for Cascading Style Sheets.
CSS describes how HTML elements are to be displayed on the screen.
It can control the layout of multiple pages all at once.
External style sheets are stored in CSS files.
* Why use CSS?
It is used to define the styles of your web pages, including the design, layout and variations in display for different devices and screen sizes.
#Css Syntax
A CSS rule consists of a selector and a declaration block.
h1 {
color: blue
}
h1 = selector
color = property
blue = value
# There are three ways we can write CSS in our HTML documents.
1. Inline CSS
2. Internal CSS
3. External CSS
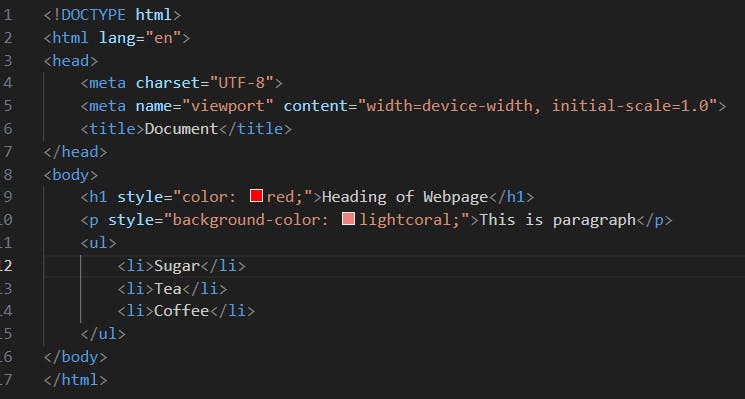
Inline CSS
Inline CSS is written with the help of the style attribute for a single element and within the element.
Example:
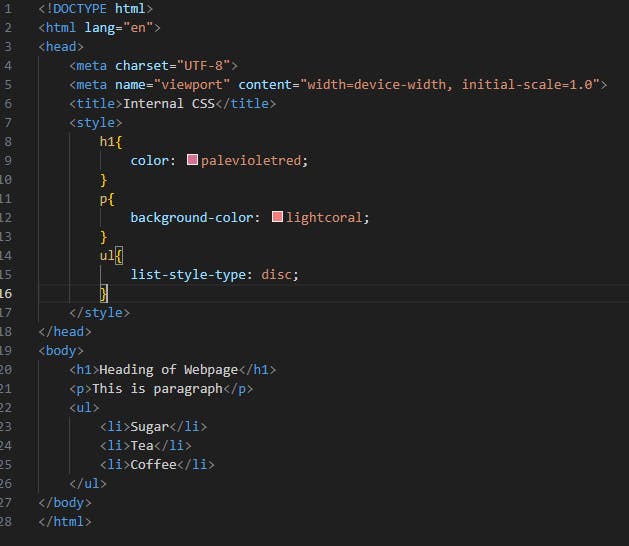
Internal CSS
Internal CSS is written within the head tag with the help of a style tag.
Example:
External CSS
External CSS is written on a different page but the CSS page going to be included in the HTML document within the head tag.

It is advisable and a good practice to use External CSS.
CSS Selectors
There are many ways to select an HTML element with the help of CSS but here we are going to learn about some important selectors.
Universal Selector
The Universal Selector (*) selects all the HTML elements on the page.
For applying a universal selector we use the asterisk (*) symbol.
HTML

Universal Selector
Individual Selector
The Individual Selector is going to select individual elements.
For applying an individual selector we can use an element name.
HTML
Applying individual selectors before and after

Individual Selector
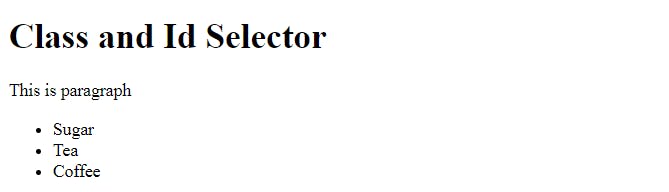
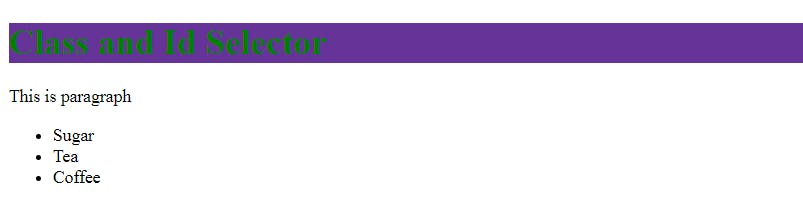
Class and Id Selectors
Class Selector
There can be many classes with the same name in an HTML document and we can target all the elements which have the same class names.
For applying a Class Selector we use the dot**(.)** symbol.
HTML
Applying Class Selector before and after
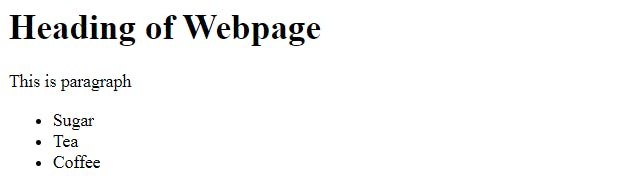
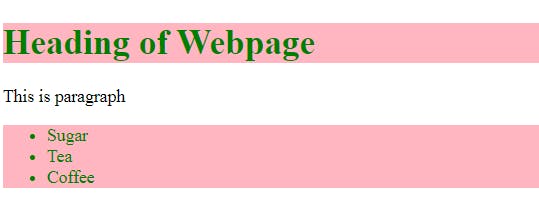
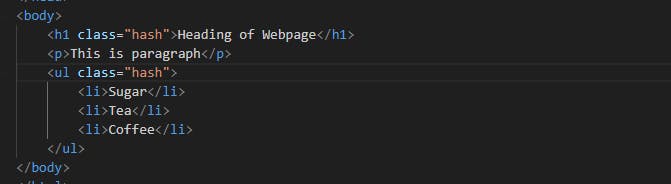
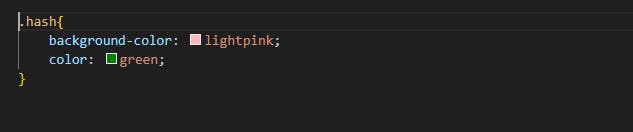
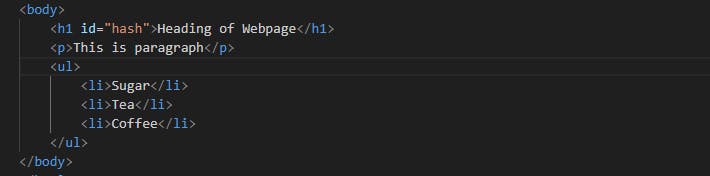
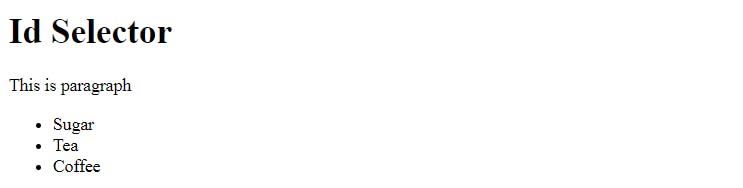
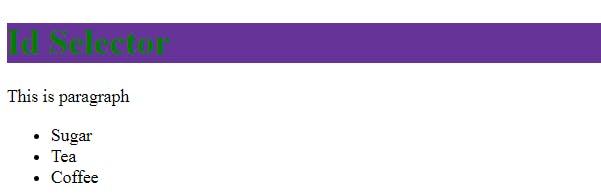
Id Selector
There can be only one id with the same name in an HTML document and we can target the elements individually.
For applying a Class Selector we use the hash**(#)** symbol.
HTML & CSS

Applying the id selector before and after
Chained or 'and' Selector
It only targets an element only when all given conditions are satisfied.
HTML
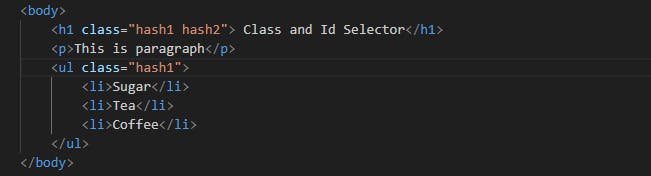
Here I want to target only those elements which have classes of hash1 and hash2.
CSS

Applying the Chained or 'and' selector before and after
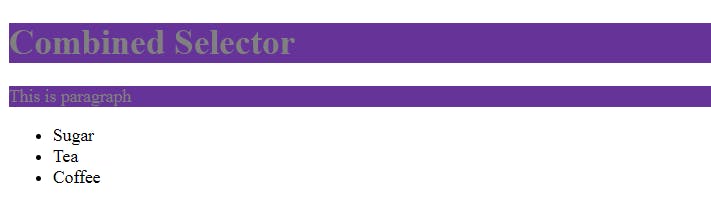
Combined Selector
A Combined Selector is used to target multiple elements.
HTML
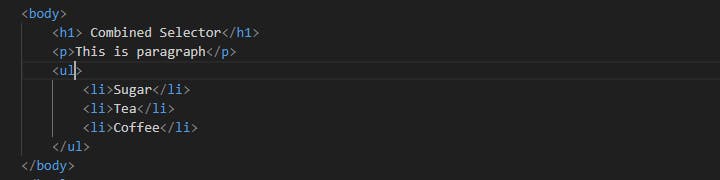
Here I want to target <h1> and <p> elements.
CSS

Combined Selector after applying CSS.
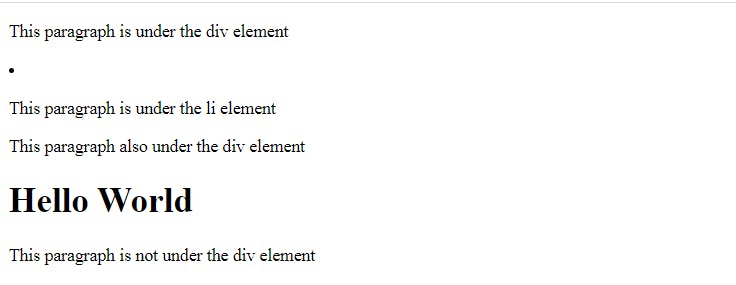
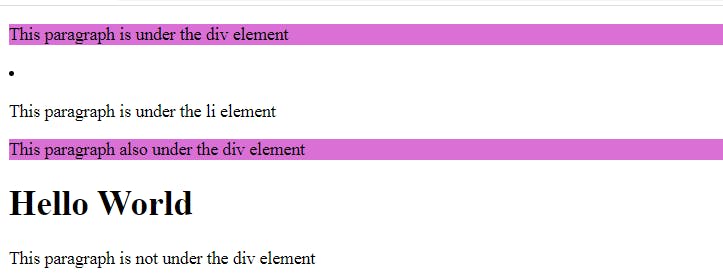
Inside an Element Selector
Inside an element selector used for target child elements, it does not matter if an element is a direct child or not.
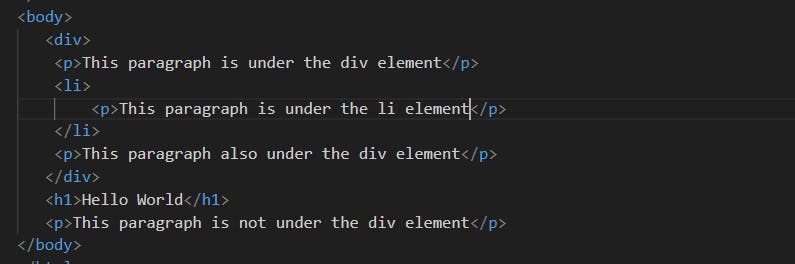
HTML

Here I want to target <p> tag which is inside <li> tag and <li> tag is inside <div> tag.
CSS

After CSS applies the inside element selector

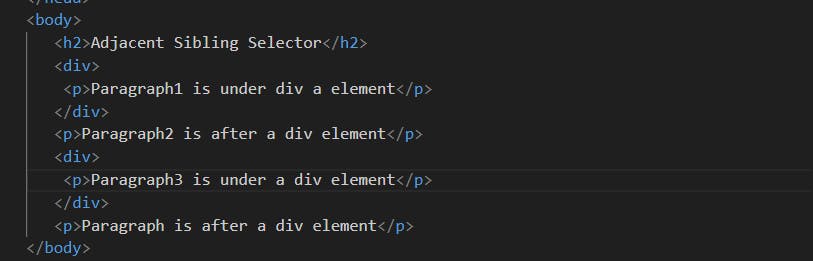
Direct Child Selector
The CSS child selector uses the (>) character to target an element that is a direct child of an element type.
HTML
Here I want to target <p> tag which is under <div> tag.
CSS

Applying the Direct Child Selector before and after
Sibling Selector
There are two types of Sibling Selector:-
1. Adjacent Sibling Selector
2. General Sibling Selector
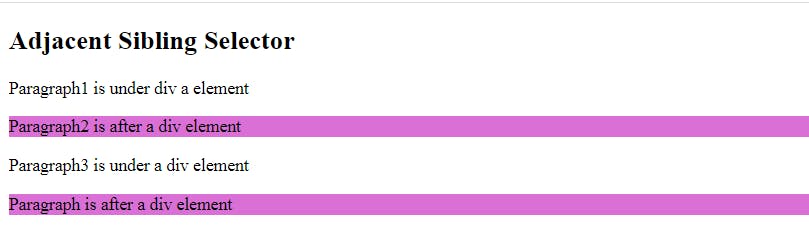
Adjacent Sibling Selector
The CSS adjacent selector is used to select only those elements which immediately follow the first selector and It is denoted by (+).
HTML
Here I want to target the next <p> element which is next to the <div> element or sibling of <div> element.

Adjacent Sibling Selector applying after CSS
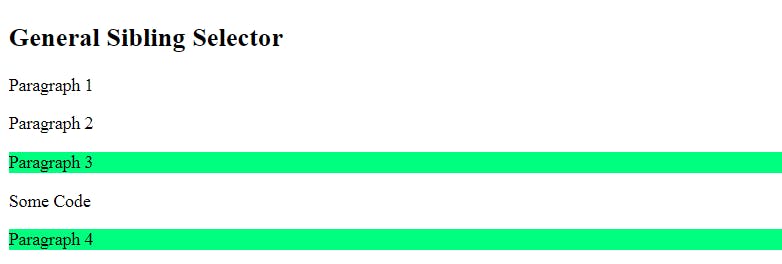
General Sibling Selector
The CSS General Selector is used to select all elements that follow the first element such that both are children of the same parent and it is denoted by (~).
HTML
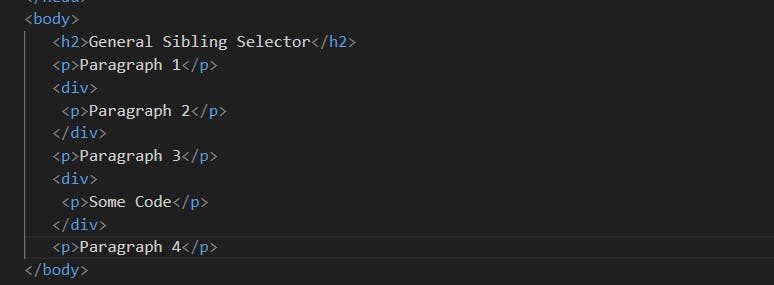
Here I want to target the next <p> element which is next to the <div> element or sibling of <div> element.
CSS
General Sibling Selector applying after CSS

Pseudo Selectors
A Pseudo Selector is a keyword that can be added to the selector that specifies the special state of an element.
* It selects a specific part of an HTML element.
* It selects an HTML element only when it is in a specific state.
The two types of pseudo-selectors are:-
Pseudo-classes
Pseudo-elements
Pseudo - Class
Pseudo-classes select regular elements but under certain conditions like when the user is hovering over the link.
A Pseudo-class is denoted by (:) followed by the classes name.
example -
:link, :visited, :hover, :active, :focus etc.....
:link
Selects and styles an anchor element that has not been visited.
HTML AND CSS
<html>
   <head>
      <style type = "text/css">
a:link{
            color: red;
        }
      </style>
   </head>
   <body>
      <a href = "">This is a Link</a>
   </body>
</html>
Output
It will produce the following link −

:visited
Selects and styles anchor elements with a valid value.
HTML and CSS
<html>
   <head>
      <style>
        a:visited{
            color: red;
        }
      </style>
   </head>

   <body>
      <a href = "">Click this link</a>
   </body>
</html>
Output
This will produce following link. Once you will click this link, it will change its color to red.

:hover
Selects and styles an element when the user hovers over it with the mouse.
HTML and CSS
<html>
   <head>
      <style type = "text/css">
         a:hover {
            color: red;
         }
      </style>
   </head>

   <body>
      <a href = "">Bring Mouse Here</a>
   </body>
</html>
Output
It will produce the following link. Now you bring your mouse over this link and you will see that it changes its color to yellow.
Without hover:

:active
Selects and styles an element when it is being activated by the user, such as when a link is being clicked.
HTML and CSS
<html>
   <head>
      <style>
         a:active {
            color: #FF00CC
        }
      </style>
   </head>

   <body>
      <a href = "">Click This Link</a>
   </body>
</html>
Output
It will produce the following link. When a user clicks it, the color changes to pink.

:focus
Selects and styles an element that had focus, such as an input field that is currently being typed into.
HTML and CSS
<html>
   <head>
      <style>
         a:focus {
            color: red
        }
      </style>
   </head>

   <body>
      <a href = "">Click this Link</a>
   </body>
</html>
Output
It will produce the following link. When this link gets focused, its color changes to red. The color changes back when it loses focus.

Pseudo-Element
Pseudo-elements allow us to create items that do not normally exit in the document tree.
Pseudo-elements in CSS are denoted using a double colon (::).
Example -
::before, ::after, ::first-letter, ::first-line, ::selection etc....
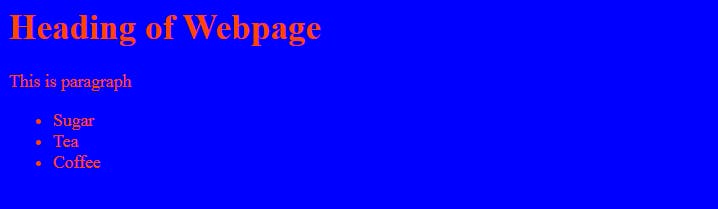
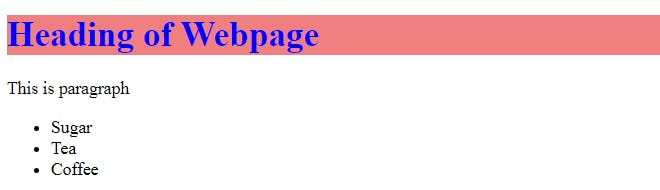
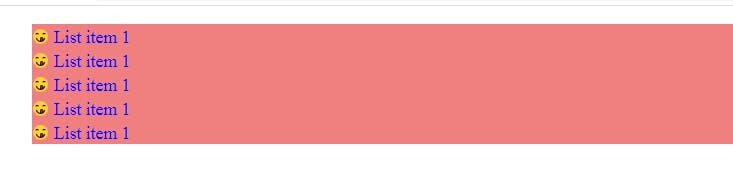
::before
The ::before creating a pseudo-element used to insert some content before the selected HTML element. The content property is used to insert the desired content before the selected HTML element. The inserted content is inline by default.
The content added using the content property can be styled using other CSS properties like background-color, color, etc.
HTML
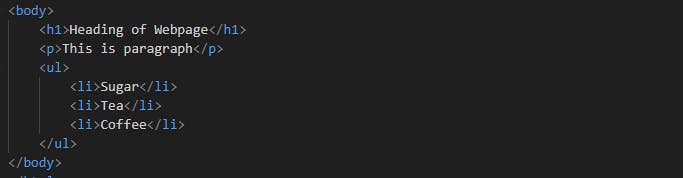
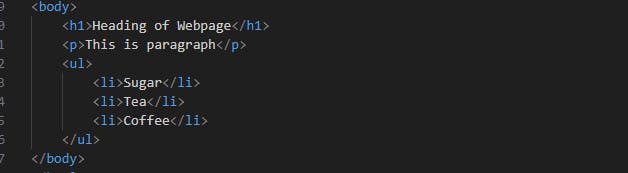
<body>
    <ul>
        <li>List item 1</li>
        <li>List item 2</li>
        <li>List item 3</li>
        <li>List item 4</li>
        <li>List item 5</li>
    </ul>
</body>
CSS
li {
    list-style: none;
    background-color: lightcoral;
    color: blue;
}
li::before{
    content: " 😋 ";
}
Output
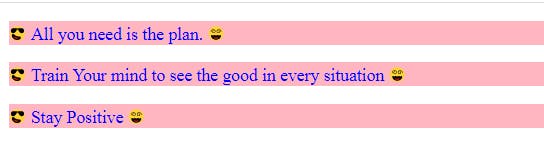
::after
The ::after creating a pseudo-element used to insert some content after the selected HTML element. The content property is used to insert the desired content after the selected HTML element. The inserted content is inline by default.
HTML
<body>
    <p>All you need is the plan.</p>
    <p>Train Your mind to see the good in every situation</p>
    <p>Stay Positive</p>
</body>
CSS
p {
    list-style: none;
    background-color: lightpink;
    color: blue;
}
p::before{
    content: " 😎 ";
}

p::after{
    content: " 😵 ";
}
Output
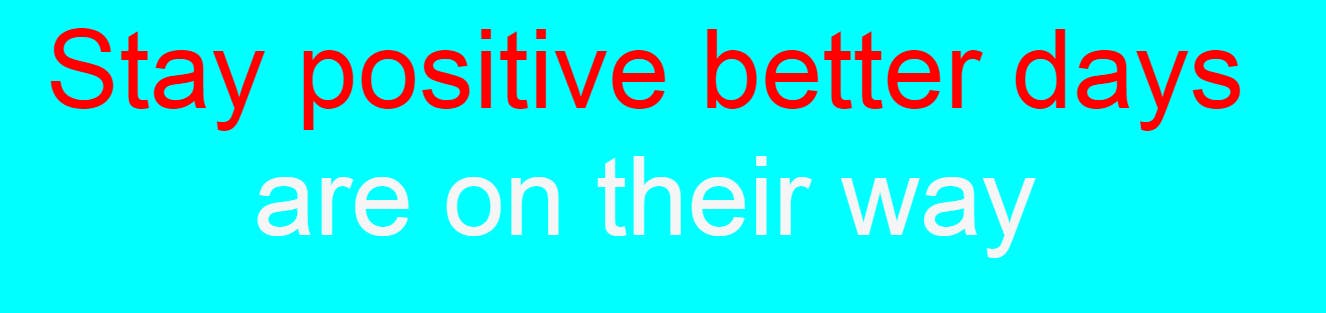
::first-line
The ::first-line pseudo element in CSS is used to apply a style to the first line of the selected HTML block-level element. The length of the first line depends on many factors like the width of the element, the width of the document, and the font size.
Only a subset of CSS properties can be used with the ::first-line pseudo-element.
* All background properties such as background, background-color, etc.
* All font properties such as font-style, font-weight, etc.
* Other properties such as color, letter-spacing, text-decoration, etc.
HTML
<html>
    <head>
        <title>Pseudo Element in CSS</title>
        <link rel="stylesheet" href="style.css">
    </head>
    <body>
        <p>Stay positive better days are on their way</p>
    </body>
</html>
CSS
body{
    background-color: aqua;
}
p{
    font-family: Arial;
    color: whitesmoke;
    font-size: 100px;
    text-align: center;
}
p::first-line{
    color: red;
}
Output
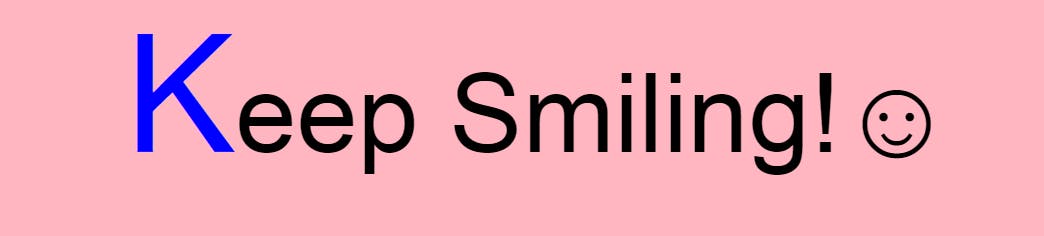
::first-letter
The ::first-letter pseudo element in CSS is used to apply styles to the first letter of the first line of the selected HTML block-level element.
A block-level element is an HTML element that begins a new line on a web page and extends the full width of the available horizontal space of its parent element.
The ::first-letter pseudo-element works only when the selected block-level element is not preceded by other content like images, inline tables, etc.
HTML
<html>
    <head>
        <title>Pseudo Element in CSS</title>
        <link rel="stylesheet" href="style.css">
    </head>
    <body>
        <p>Keep Smiling!☺️</p>
    </body>
</html>
CSS
body{
    background-color: lightpink;
}
p{
    font-family: Arial;
    font-size: 100px;
    color: black;
    text-align: center;
}
p::first-letter{
    font-size: 150px;
    color: blue;
}
Output
::selection
The ::selection pseudo element in CSS is used to apply styles to the part of the HTML document highlighted by the user by clicking and dragging across the text.
Only the below CSS properties can be used along with ::selection.
background-color,
color stroke-color,
fill-color,
and stroke-width text-decoration and its associated properties,
text-shadow
HTML
<html>
    <head>
        <title>Pseudo Selection in CSS</title>
        <link rel="stylesheet" href="style.css">
    </head>
    <body>
        <p>Life is better when you are smiling</p>
    </body>
</html>
CSS
body{
    background-color: aqua;
}
p{
    font-family: Arial;
    font-size: 60px;
    text-align: center;
    color: black;
}
p::selection{
    background-color: red;
}
Output